Dice Box
Source CodeThe fun one! After a lot of fairly earnest work at trying to design new interfaces, I felt that there wasn’t enough fun in the project. The original set of concepts had quite a lot of fun (but maybe impractical) ideas. Around this time the Twitter/Reddit meme of terrible phone number interfaces was going around and I thought ‘these people are basically doing my project, but having more fun’ (then right at the end of the project the ‘worst volume control’ meme happened). This ended up being by far the most complicated and involved prototypes, but also the most fun to build.
Having spent some time considering the different ‘families’ of number interactions I knew that I wanted to include a random number interface. Immediately the idea of using dice came to mind, being the classic (human) random number generator. I remembered reading about the Dice-O-Matic years ago, but wanted to make an interface, not a totally automated machine. This was about bringing the human back into the loop rather than creating a physical version of Math.random().
I did some quick OpenCV experiments with 6 sided dice, and while their flat surfaces make the recognition task pretty easy, I knew I wanted better resolution. The idea was to have a random number generator that could stand in for Math.random() (to some degree), not specifically for playing board games. I also wanted a bit of a challenge, so decided to use 10 sided dice. The idea was to have a set of dice in a box that when shaken would transmit the dice rolls inside.
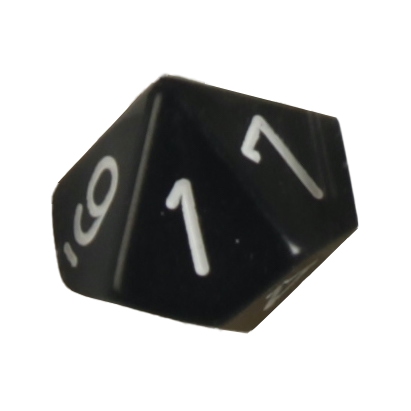
A ten-sided die.
The challenge of 10 sided dice is that more than one face is visible at a time, I felt that crafting traditional computer vision heuristics for this would be time consuming and possibly inaccurate. I decided to try a deep learning approach.
Building a robot to build a dataset
To train a deep learning model I was going to need a dataset. Fortunately for this project the environmental conditions could be very well controlled. I designed and 3D printed a box that would hold three dice, each in a separate channel to ensure they were always separated and with a ramp so they would reliably land in the same position, flat on one side. The box was equipped with a Raspberry Pi Zero, a camera, a white LED per die, and an accelerometer.
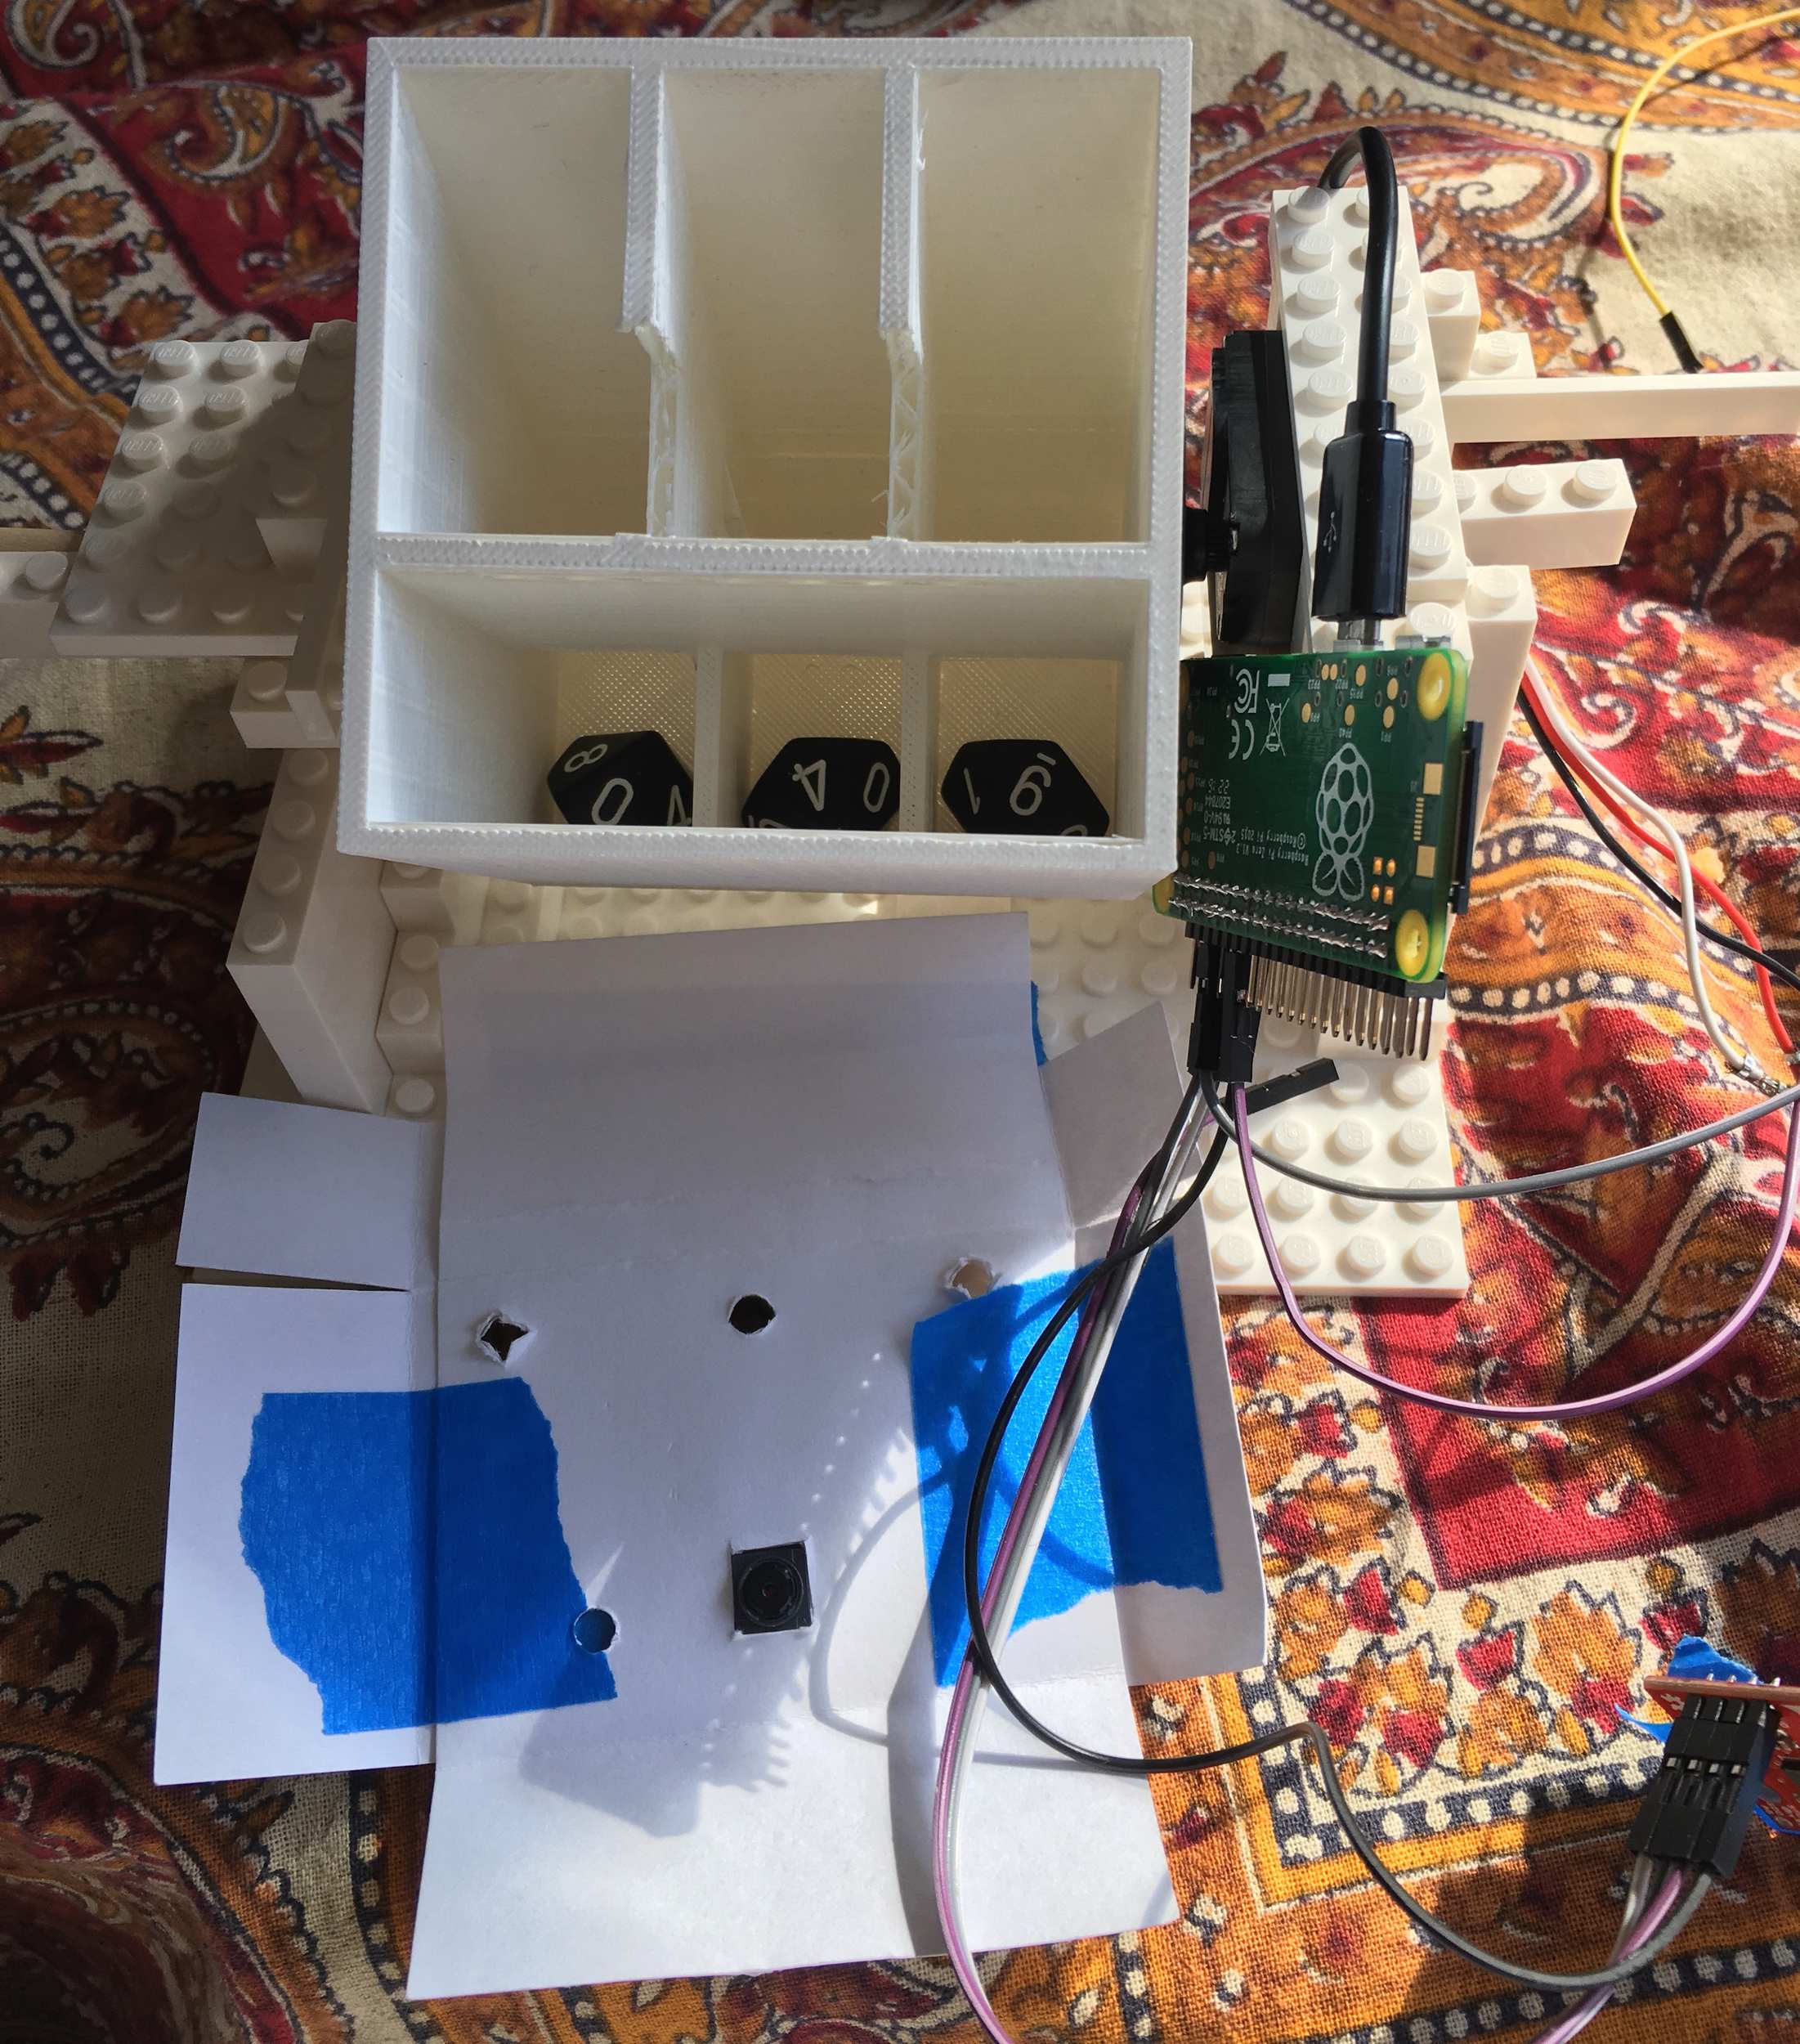
The 3D printed / Lego / Paper dice rolling robot
Sensor libraries for the Pi can be a little thin on the ground, so I ended up implementing the sensor reading I needed from the LSM9DS1 accelerometer from scratch using the I²C protocol.
When shaken the dice would roll into position, the accelerometer would detect when the movement had finished, the LEDs would turn on (to ensure consistent lighting) and the camera would take a picture. The images were then rsynced to my laptop. The camera settings were tweaked to be highly exposed, ensuring very clear contrast.
Sensor libraries for the Pi can be a little thin on the ground, so I ended up implementing the sensor reading I needed from the LSM9DS1 accelerometer from scratch using the I²C protocol.
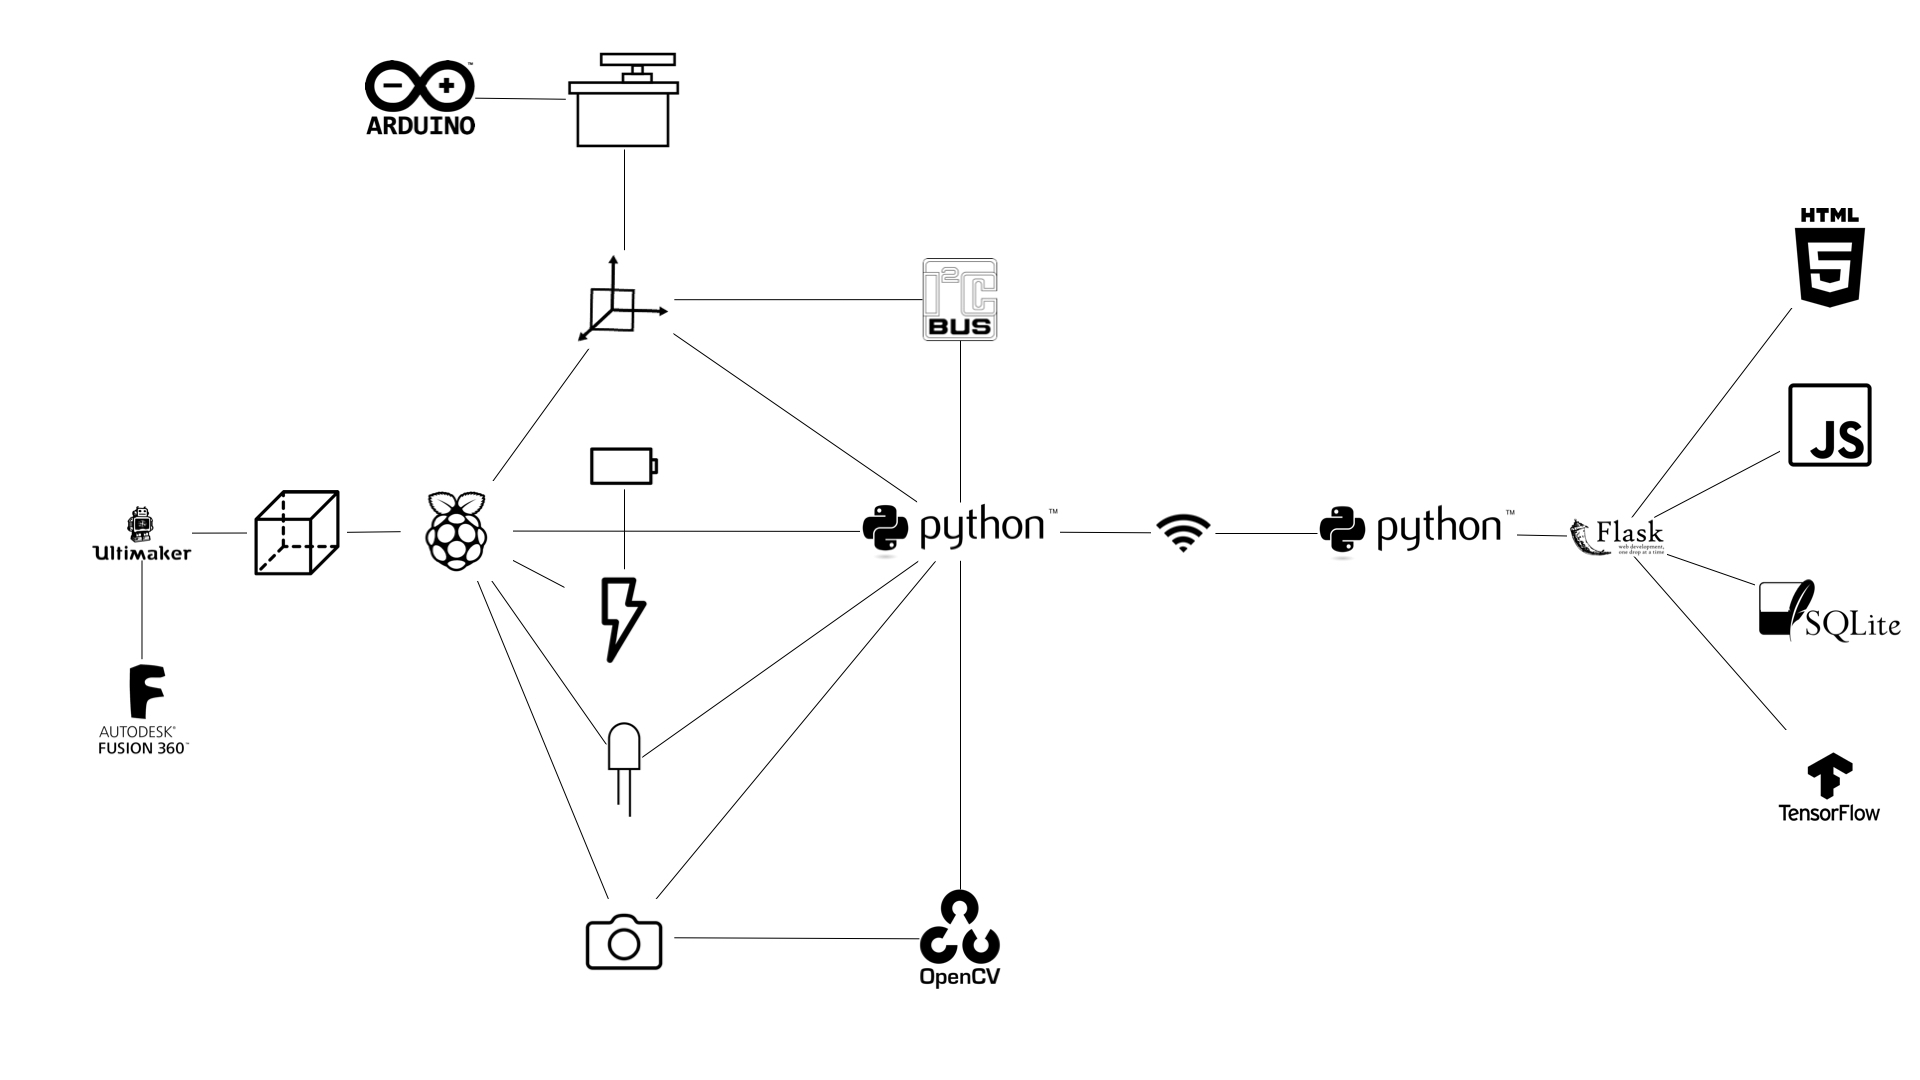
System diagram for the Dice Box
I attached an Arduino controlled servo to the box, on a little Lego rig. The Arduino didn’t get any feedback about when the image capture had finished, I just set it to run at a fixed time that allowed enough time. Each roll took 2.5 seconds, and I left it running for about three hours. With three dice per roll this gave me about 15,000 images.
Automated dice rolling and photographing
Labelling
The next step was to process and label all of the images. I wrote a Python script to batch crop the images into three. As the images were black and white, any image that were entirely black (taken without LEDs on) or entirely white (dice was not in shot, stuck or mistimed shot) had a much smaller file size than a good shot; removing these was easily automated with another script.
Then came the manual labelling. As this was a project about number interfaces, it only seemed right to design a bespoke interface for this task. I’m a fast touch-typist, but long strings of numbers aren’t very common. I felt that I would be faster if I assigned one number symbol per finger and did a little bit of relearning.
Rather than use the number keys, which aren’t well positioned for resting all ten fingers, I just dropped my hands onto the keyboard and used the keys that they naturally fell on. To make sure I remembered what they were between sessions I made a paper stencil and taped it to my laptop, taking inspiration from the Tom Stable’s lovely project Jane vs The Remotes.
Keyboard stencil
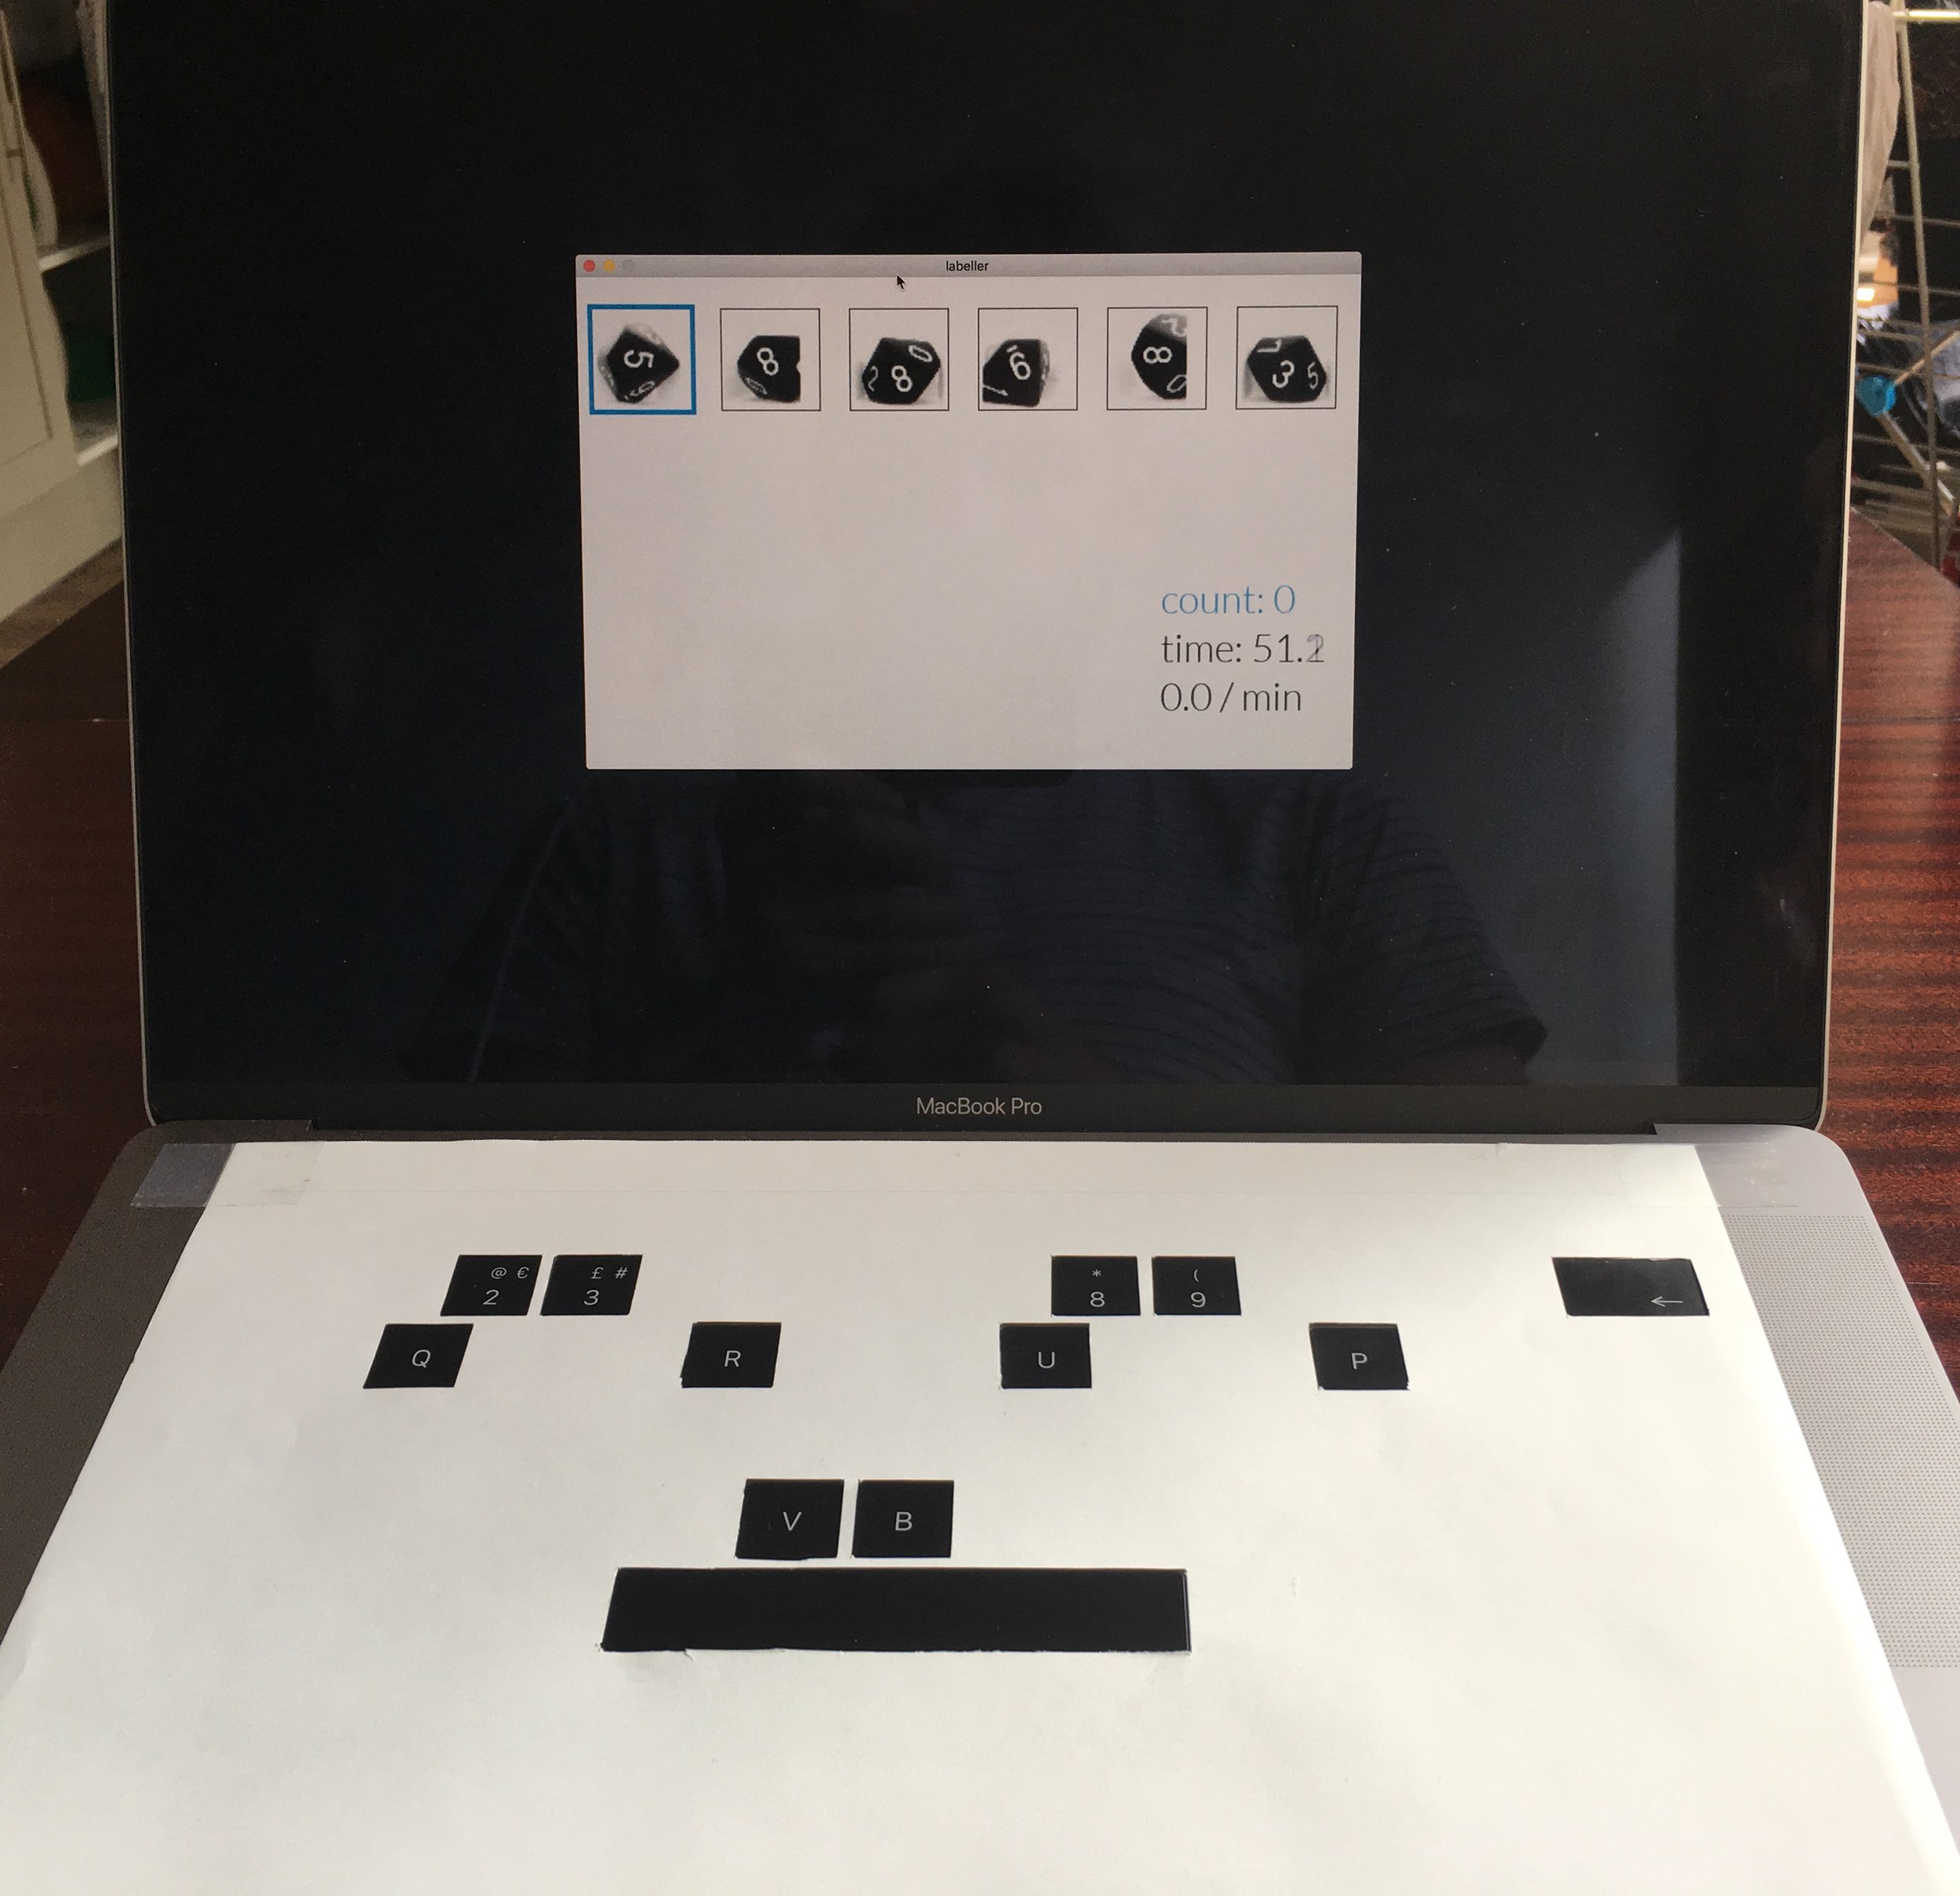
I created a small program in Python that would display images and listen for keyboard input. To make the experience as fluent as possible, 12 images were shown at once so that the digits could be read as a word rather than individual characters. I found that when completing a line, jumping back to the beginning caused a pause. I changed the ordering so that the next image moved around the two lines in a circle so that the next image to label was always visible and the eyes didn’t have to make any big jumps. Spacebar was mapped to undo, and Backspace would skip a bad image. Being the somewhat self-competitive person that I am, I added stats and managed to reach a max of about 115 per minute, and an average of 1000 per 10 minutes. With breaks I labelled the whole set in a bit over three hours.
Labelling dice rolls with the keyboard stencil and custom software
Deep Learning
Rather than train the model from scratch, I wanted to try Transfer Learning –re-training an existing model– with my 10 image classes. I swapped out the final layer and set it running. My first, quick attempt with 8000 training steps resulted in 95.9% accuracy, and the final run with 200,000 bumped this up to 98.7%.
Final Housing
Modifications were made to the box design so that it could properly accommodate the Raspberry Pi Zero, camera, LEDs, accelerometer, battery and a power switch. I also made the front and back panel removable, and the front panel out of clear perspex so the dice inside were visible.
3D Model in Fusion 360
Render of model
The real dice box